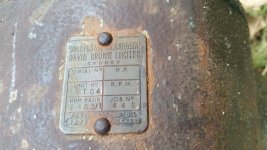
Gear Box Post Hole Digger Sonnerdale Richardson David Brown Limited BPT04

aussie54

New User
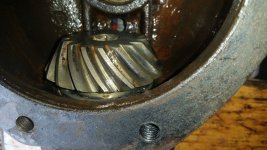
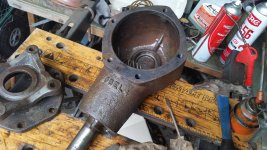
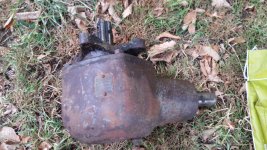
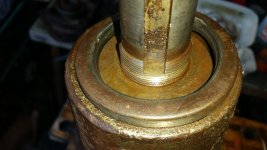
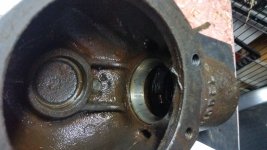
Hi all, I am hoping somene will be able to help me with extracting the Drive shaft out of the housing of this post hole digger.
I have the seal out so just need to know the method to get that shaft and tapper bearings out. I cannot find any info on this in Google etc. Thanks
 

Attachments

  • 20240314_150257.jpg
    20240314_150257.jpg
    4.7 MB · Views: 34
  • 20240314_150238.jpg
    20240314_150238.jpg
    4.8 MB · Views: 43
  • 20240314_102103.jpg
    20240314_102103.jpg
    5.3 MB · Views: 36
  • 20240313_172418.jpg
    20240313_172418.jpg
    5 MB · Views: 39
  • 20240313_172424.jpg
    20240313_172424.jpg
    4.2 MB · Views: 31
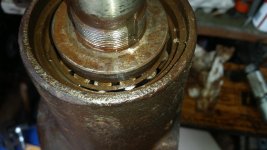
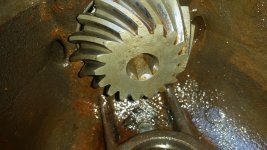
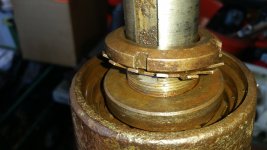
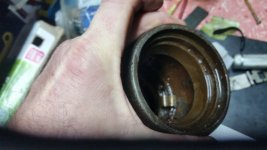
2nd picture. The round thing is the nut that holds it all together. Look in the edge of it for a hole . That hole is meant for a "pin spanner" like this:
1710517318496.png

If you don't have a pin wrench, you can drive the nut loose with a punch and hammer, or an air chisel with a punch/pin bit. If the hole looks damaged, that is probably what was done in the past. It would have been easier to get the nut off with the other gear intact.

This is not from specific knowledge of this gear box, it's just from looking at the pictures. It's pretty generic, not all that different from a ring and pinion setup in a pickup truck axle.
 
2nd picture. The round thing is the nut that holds it all together. Look in the edge of it for a hole . That hole is meant for a "pin spanner" like this:
View attachment 62693
If you don't have a pin wrench, you can drive the nut loose with a punch and hammer, or an air chisel with a punch/pin bit. If the hole looks damaged, that is probably what was done in the past. It would have been easier to get the nut off with the other gear intact.

This is not from specific knowledge of this gear box, it's just from looking at the pictures. It's pretty generic, not all that different from a ring and pinion setup in a pickup truck axle.
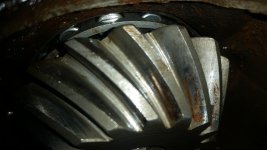
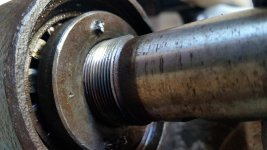
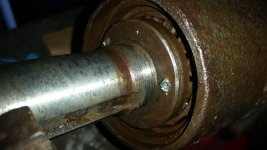
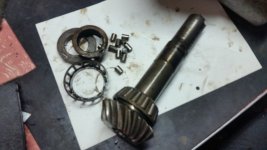
Thanks for your reply. There was a nut and retaining lock washer and seal that I removed but did not show them in the pics. I have now added more pics to this thread. I did try and hammer the shaft a few times but it did not move. I do not want to belt it too hard at this stage unless I know it is the correct way to get the shaft out. I know that tool as it is usually used for removing some caps off from hydraulic cyclinders. It maybe nothing, but there is a large Hex hole at the end of the pinion gear.
 

Attachments

  • 20240316_110055.jpg
    20240316_110055.jpg
    5.1 MB · Views: 21
  • 20240316_110109.jpg
    20240316_110109.jpg
    3.8 MB · Views: 13
  • 20240316_110123.jpg
    20240316_110123.jpg
    3.8 MB · Views: 13
  • 20240316_110514.jpg
    20240316_110514.jpg
    4.6 MB · Views: 13
  • 20240316_110628.jpg
    20240316_110628.jpg
    4.3 MB · Views: 14
I suspect that the hex hole was used to steady the pinion gear during maching.
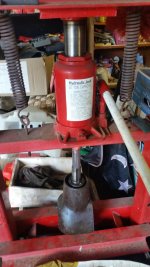
I suppose I will apply some heat to the spacer and try and slowly press out with a 20ton press.?
 
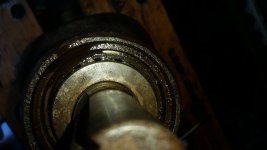
The hex is to hold the shaft/gear while unscrewing the second nut . It is not pressed in like you think. It is more like a wheel bearing where you take off the nut and locking washer then take the second nut off then the shaft and gear will slide out of the bearing with a light tap on a block at the end of the shaft. Pay close attention to the shims if there are any how they were since it will need to be put back like it came apart . IF anything is changed like bearings the gear lash will need to be reset for any difference in the bearing thickness this is much like a rearend in a vehicle. In the second set of pictures the third one looks like it might have a snap ring behind that bearing or it is just the way the light is. Also if you can turn the gear with an allen wrench you can probably hold the nut with a rag and your fingers. Other wise I would drilll a couple holes ina a small bit for a spanner wrench to hold the nut. right in the face of it. I would find the wrench you are going to use first so the holes would match it.
 
The hex is to hold the shaft/gear while unscrewing the second nut . It is not pressed in like you think. It is more like a wheel bearing where you take off the nut and locking washer then take the second nut off then the shaft and gear will slide out of the bearing with a light tap on a block at the end of the shaft. Pay close attention to the shims if there are any how they were since it will need to be put back like it came apart . IF anything is changed like bearings the gear lash will need to be reset for any difference in the bearing thickness this is much like a rearend in a vehicle. In the second set of pictures the third one looks like it might have a snap ring behind that bearing or it is just the way the light is. Also if you can turn the gear with an allen wrench you can probably hold the nut with a rag and your fingers. Other wise I would drilll a couple holes ina a small bit for a spanner wrench to hold the nut. right in the face of it. I would find the wrench you are going to use first so the holes would match it.
Thanks for your advice. So the spacer/collar/nut shown has a thread? I have never seen such a setup in that the second "nut" has nowhere to use a spanner etc. I will carefully clamp on it using some protective rubber padding and hold the shaft by the hex recess. The collar is recessed so will be an experience to grip it.
 
I held the shaft in a vice and used a drift/hole punch (on the flat non critical surface) and was able to spin the spacer. It just spins and spins but does not travel up on the tread. I am stumped so what now??
 

Attachments

  • 20240318_122123.jpg
    20240318_122123.jpg
    3.6 MB · Views: 8
  • 20240318_122113.jpg
    20240318_122113.jpg
    4.7 MB · Views: 9
Yay! Success. After all that mucking about the spacer ended up being just a simple press off/on affair. I have new parts and I will now be able to complete the rebuild. A cold one will have to follow after that..
Thanks all for your help..
 

Attachments

  • 20240318_153649.jpg
    20240318_153649.jpg
    1.9 MB · Views: 15
  • 20240318_153942.jpg
    20240318_153942.jpg
    3.3 MB · Views: 8
  • 20240318_153937.jpg
    20240318_153937.jpg
    3.6 MB · Views: 6
  • 20240318_153933.jpg
    20240318_153933.jpg
    3.3 MB · Views: 9

We sell tractor parts! We have the parts you need to repair your tractor - the right parts. Our low prices and years of research make us your best choice when you need parts. Shop Online Today.

Back
Top